
We struggled with the instructions that came with the patern for quite a while before making a big decision. Instructions are just ONE way to do things. I checked my books and looked on line and found MANY different ways of making a double welt pocket.
Then I found THIS video and decided it was the most simple way forward.
I thought people may find it useful to see how someone else interprets the instructions and so here is my attempt to follow the instructions.
What I used:
Seam Ripper
Step One. Preparing the welts and the garment.
 This method of making the pockets starts with the welts being interfaced and unfolded. The method I originally tried involved started with he welts folded in half (wrong sides together) and a baste stitch along the long edge. I either had to unpick the baste seam or cut out fresh welts and interface them.
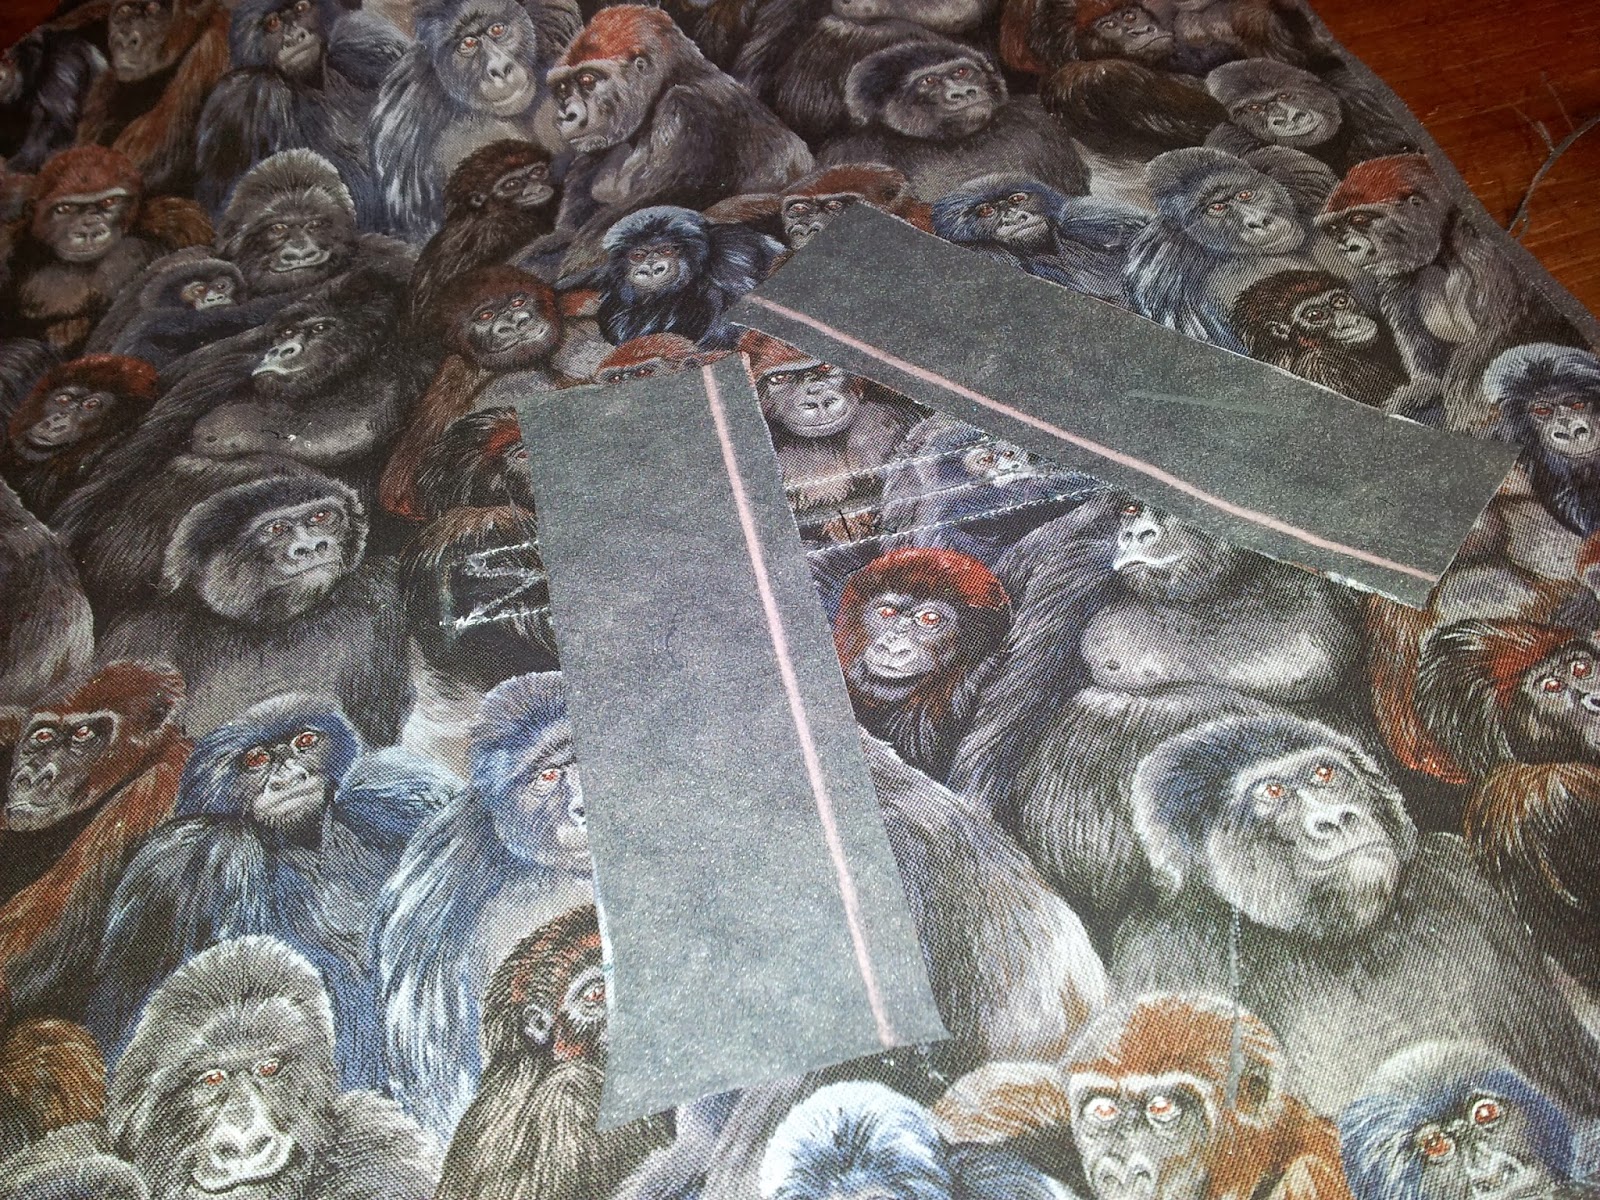 I had already slashed the pocket hole in the waistcoat open in the previous pocket making attempt. To keep the pocket area stable I pressed all the seams shut and interfaced the wrong side of the fabric over the slash. This should help keep everything stable whilst I sew.
When sewing in the middle of a garment you will not be able to see the seam guide marks on your sewing machine. Therefore it is a good idea to mark out the stitching line with chalk first.
Step Two. Sewing the welts onto the garment.

Pin the welts so their edge s meet together at the slashing point on the garment. Stitch along the chalk line not from end to end but from the circle mark on the pattern to circle mark on the pattern. If like me you are working without a pattern then sew from the point where the slashing end, about 1cm in from the welt.
Step 3. Slashing the Garment and Turning Through.
 Fold back the welts so you can see the slashing line and carefully slash open the garment. Slash a straight line 1cm from the end of the cutting line on each side. Then cut two diagonal lines to 1mm from where the welt is sewn. repeat on the other side of the pocket.
 Fold the welts to the inside of the garment.
  Press the seam allowances of the went and garment open.
Step Three. Tagging the "Duck Tails".
 If everything has gone correctly the right side of your garment should look like this. The hard work is really done (and it wasn't that hard was it?)
 If you look on the right side of your garment the vent should now be taking shape. If you are following a pattern the welts should be folded so the meet in the middle of the pocket and their raw edges match up to the raw edge of the pocket slash. If not fold and press your welts into the correct position and trim them so they match the raw seam. On either side of the slash in the garment you should have two small triangles of fabric. These are the Duck Tails. Fold your garment over on it's side so the pocket welts and the duck tails lay flat on your machine and sew these duck tails down.
Step Four. Sewing the Welts on the Inside of the Garment.
 Give everything a good press again. Now pin the lose edge of the welt to the seam allowance on the slashed part of your garment. Sew WITHIN the seam allowance of the slash seam. Repeat for the second welt. The welt is now secure, all that remains is sewing on the pocket bag.
Step Five. Sewing on the Pocket Bag.
 One of the many difference between a single welt and double welt pocket is that of the pocket bag. Single welt pockets have a one piece pocket bag, double welt pockets have a two part pocket bag, nodally one piece made of lining and the other of the outer garment fabric. I began with the lining pocket piece which is attached to the lower welt.
Place the pocket piece on the lower welt on the reverse side of the garment. "Right sides together" the pocket piece should appear "upside down" so it's point towards the top of the garment. Stitch the pocket bag in place within the seam allowance of the welt.
 Repeat with the second pattern piece which is places rights sides together against the top welt (so the pocket piece is pointing towards the bottom of the garment. Again stitch to the seam allowance of the welt.
Step Six. Stitch the Pocket Bag Together.
 Rest the top pocket bag on top of the lining pocket bag, pin together and sew in place.
 And behold you have a fantastic double welt pocket! When you open the pocket you will see the same fabric as the garment is made of.
I have to admit I really enjoyed learning a new technique for sewing. I'm also amazed at how neat and professional the finish on this pocket is. I will definitely be using this method again.
I must thank Diane Deziel for her amazing sewing tutorials on youtube. Check her out and see else you can learn.
Bwahahahah gorillas!! Great tute. I'll be saving this one for future usage
ReplyDeleteThanks for the help!! And thank god for Diane's tutorial! The finished thing looks excellent :) Now that I know they aren't so hard to do I'll definitely be doing double welts again.
ReplyDeleteGlad you both enjoyed the post. And yes a gorilla waistcoat is going to look VERY awesome :) Should be finished on Tuesday with luck :)
ReplyDelete