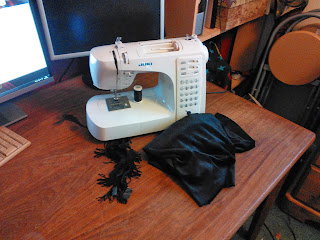
This sewing project was born through necessity. I lost my favourite velvet scarf and had no intention of paying £25 for a replacement. I took a good look at a scarf in a shop and decided I could make it for around £5.
I decided my new scarf would be velvet to replace the one I lost. I was never a fan of the long tassels at each end of the scarf but found scarves without a decorative edge seemed a little unfinished. One perk of sewing your own clothes is that you don't have to make compromises. I decided to use a short fringe so that the scarf will still look sophisticated., but not get tangled up.
You will need:
Half a metre of Velvet (150cm Wide)
Half a metre of fringe
Matching sewing thread
Sewing Needle
Pins
Thread snips.
Version one.
 Step one. Marking out.
Take your half metre of velvet and fold it in half, so you have a rectangle 150cm by 25 cm.
Mark where the fold of the fabric is, and then unfold it, so you have a mark half way on the short side of the fabric.
Step two. Adding the fringing. The fringing is held on a strip of braid. We will want the fringing visible but not this braid.
Pin the fringing along the short edge, going from the edge of the fabric to the middle point we just marked.,
The braid of the fringe should be along the edge of the fabric and the fringing pointing down the fabric.
Stitch the fringing to the velvet along the braided edge. Repeat on the other short edge.
 Step Three. Sewing up. Fold the fabric in half along the long edge, right sides together. Pin and sew with a seam allowance just wider than the width of the braid that holds the fringe. Make sure to leave a small gap on the long edge around 10cm long.
Pop your hand through the gap and pull the scarf right side out. Press with an iron and slip stitch the gap shut. (Or just use wunder web).
And Hey Presto you have a fabulous scarf to cut a dash in (or to give as a gift) for around five pounds.

Version 2
The above scarf has three sides sewn. It is just as easy to make a scarf out of two narrow strips of fabric of around 150cm by 28cm. Whilst this means you have an extra seam to sew you have the opportunity to use two different colours of velvet, or to add ribbon to one side of the scarf.
The only difference to the above method is you don't have to find the half way mark on the short end. Simple pin the fringe across all of the short end, you can also top stitch ribbon along the width as well.
Then just sew the two strips of velvet together, right sides together again leaving a gap for turning through.
There you have it, two ways of making a simple but sophisticated scarf. These scarves were an experiment in that I used a velour with a stretch. I was concerned that this would make the scarf shapeless, but I've found it works fine.


Gaaah I cannot believe I've never w-webbed a gap closed on something like this. Genius!
ReplyDeleteWunder Webbing instead of slip stitching is one of my guilty secrets. I will stitch properly when I have time but when in a rush I do wunder web instead. Sometimes I'll wonder web top keep things in place THEN slip stitch, It makes things MUCH easier :)
ReplyDeleteThank you,I'll try this soon.
ReplyDeleteThanks I've bought the velvet,just wanted to check method before starting. I didn't want a fringe though
ReplyDelete