Showing posts with label Costume. Show all posts

Monday, 3 June 2013

How do you get a design onto your t-shirt or other fabric?

Have you ever suddenly realised you had mixed up your party invites and you had a costume party to go to in one hour? This happened to me and my girlfriend a few weeks ago. We ran into my sewing room all set to fulfil the brief of the party, we had to bring out our inner geek. I took the quick and simple option and just put on one of my many Star Wars T-shirts. My girlfriend wanted to put a design onto an old t-shirt, in less than an hour! We didn't have time for Dylon Image Maker, we only had time for pens, and weirdly enough, Wundaweb.
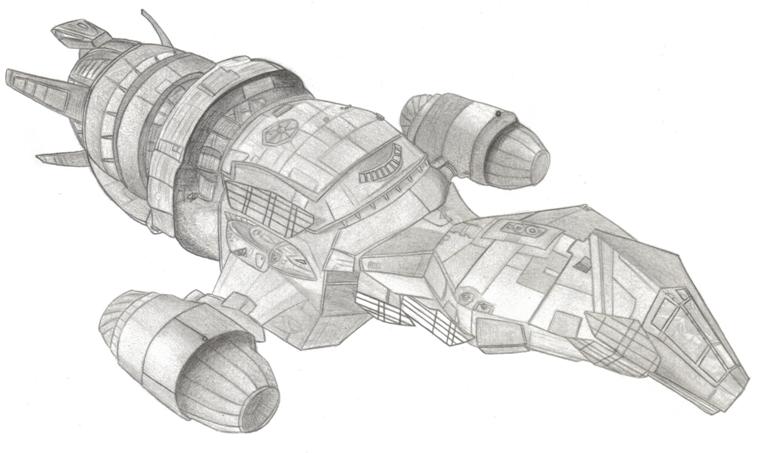
We had some fabric pens and permanent markers, however we only had one shot to make this work. The initial design was a little complex with plenty of chances to make mistakes. If you're wondering it was an image of "Serenity" from Firefly. If we could trace the design onto the fabric first it would certainly reduce the chances of messing things up. We had to think outside the box and use some of our dressmaking kit in new and interesting ways. 

 Option 1

Drawing out a design in free hand first with Taylors Chalk before filling it in with Fabric Paint or Fabric Pen.
If you find the triangular dressmaking chalk tricky to use then  there are Dressmaking Chalk Pencils out there as well as a special Vanishing Fabric Marker.

Handy if the design is relatively simple, but what if you have a more complicated design?

Option 2

Trace the design onto the fabric using Dressmakers Carbon Paper. This handy bit of dressmaking kit is normally used to transfer markings such as dart lines onto your fabric.  Dressmakers Carbon Paper actually comes in a lot of colours, and not in 'carbon'. Most packs have blue, red and yellow as well as white so finding a sheet to show up on your fabric should be easy. Place the 'carbon' paper onto the fabric (coloured side down) and then pop your design over the paper. Use a tracing wheel to transfer the design onto your fabric, and then use paint and pens to  fill it in.

Time was  running short  and whilst option 2 would work very well we couldn't get a print out of the design the right size. So a change of plan was in order. Pac-Man! Well more accurately one of the ghosts (who by the way are called "Blinky" "Pinky" "Inky" and "Clyde").  A "Blinky" was drawn out on graph paper to ensure it was nice and 'blocky'. The graph paper pattern was then used to cut the ghost out in some non fray velour. Eyes and pupils were cut out of felt. The pupils where added to the eyes with Wundaweb instant hemming tape, then the eyes were stuck to the body with wundaweb and then the whole ghost to the t-shirt with Wundaweb. Wundaweb Instant  Hemming tape is easy to use. You just place it between the two layers of fabric and then iron your garment. A pressing cloth isn't essential but gives a much better finish. One unique geeky t-shirt made in under 15 minutes. Instant hemming tape is normally good for 15 washes so it should last a while.

So next time you have to make something special in a flash DON'T PANIC! Just look around your sewing box and think how you can use things a little differently. 

Monday, 22 October 2012

A simple Halloween & Autumn Decoration

In the past I've made some intricate stuffed fabric Pumpkins. Whilst many people liked these a lot of people said they were put off by the amount of time each pumpkin would take, and the amount of sewing. After some playing around I've managed to create a very simple, but in my opinion rather cool pumpkin pattern. Don't feel constrained to orange fabrics, you can make a very ethereal creation with  a shimmering white or pale pink, or something festive with a Brocade.

You will need:
A rectangle of fabric 15 cm by 30cm
Small piece of fabric for the stalk
Scissors
Pins
Sewing Needle  (hand sewing needles  and Sewing  Machine Needles if using a machine)
Tailors Chalk
Toy Stuffing
Thread

Mark out a rectangle of 15cm by  30cm and cut out.

  Fold the fabric in half giving you a Square of 15cm by 15cm Stitch down the side opposite the fold

Sew two lines of parallel stitches at the bottom of the square. This is to perform a gather. You can do this perfectly well with hand sewing, just pull the threads tight and tease the fabrics into gathers. I used a sewing machine, anchoring the threads at one end with a back stitch but not at the other, then pulling the threads to make the gathers.


 Once you've gathered the fabric like this top stitch between the two lines of stitching to secure the gathers. Fold  right side out. You should now have a little bag with an open top and gathered bottom.


 Fill the pumpkin with toy stuffing. You can use cut up scraps of wool or fabric to save money here, But a bag of toy stuffing costs under £4.00 and my bag has lasted me many many projects.

With a hand  sewing needle run a stitch along the top of the pumpkin, pull this tight and secure to create a ball. 

To shape the groves into the pumpkin secure some strong thread with a stitch at the top and wrap it to the bottom of the pumpkin pulling tight, secure with a stitch and wrap the thread to the to and secure with a stitch  repeat   for as many grooves as you like. I started with four, equally spaced.


Take two rectangles of green fabric to be the stem. I used 6cm by 4.5cm. Sew together along the long sides and one short side (leaving an opening for turning through and stuffing. The line of stitching at the top doesn't have to be straight, making it a little slanty can make the stem look more organic.


Turn through using a pencil (yes I DID spend 10 minutes trying to use my finger before I thought of the pencil) and then use the pencil to stuff the stem with toy stuffing.


Stitch the stem onto the top of the pumpkin using small stitches going around the base of the stem.


And behold a pumpkin. I thought this was cute, however my favorite pumpkins have more grooves so I added another set of four using the same method as the original grooves.
 I am rather proud of my little pumpkin. There may seem to be a lot of steps but only because I wrote down EVERY little thing. You should be able to make up one of these little guys in 20 mintues or so. You could even cut out triangles  in felt to make a Jack-o-lantern and glue it on with fabric glue. As well as Halloween these decorations could be used for an Autumn display  or part of a costume (be it the green goblin or headless horseman)

Tuesday, 25 September 2012

Halloween preparations.

Halloween means many things to many people. For some it's a chance to grab some free sweets whilst for others it's a chance to let rip and show off an alter ego. For me it's all  about the chance to make the sort of costumes I love to make, but would not normally fit in at  say a wedding.

Halloween Organza Fabrics 
 There are many advantages to making your own costumes as opposed to renting or buying. For example it CAN be cheaper, in my case it tends to cost about the same BUT it's of a much higher quality.

However for me the main advantage is it helps show my creativity. This isn't something to stress about. No-one really judges you, it's more about how you feel about yourself. Looking at an insane black and purple petticoat laying under layers of  organza can give you a great sense of achievement.But creativity is not just a case of using fabrics we would normally not use, or extreme design. Halloween is an excuse to colour outside the lines, to through caution to the wind and to make yourself, or someone else, something spectacular.

Moonlight Web in Bronze
There are many wonderful costume ideas in the pattern books, but you cold also make a plain outfit into a Halloween masterpiece by just adding trimming, ribbons or layering it with one of our translucent spiderweb fabrics

To help  you on the way to creating your own master piece we have some free tutorials on the website
at http://www.fabric8online.co.uk/free-stuff
Here you can learn to make a cape, a cravat (for the CLASSIC Vampire, none of this sparkly stuff)  or a Tu Tu or a cape.

Also on this blog we have "how to make a pirate shirt" and "How to make Pirate pants". The pirate pants make great Genie pants.

To help you with your Halloween preparations we will be running a few mini blogs in the next week. From making petticoats and wings to organizing a Halloween Party!.