Monday, 4 February 2013

Knitting clothes for little ones.


Hi it’s the COO of the company taking her turn on the blogs.

Choosing your baby’s knitting pattern

The first thing to note that unlike an adult’s knitting pattern babies and children are worked out by age (or for premature by weight).
For this blog I have chosen a new born boy’s sweater on the basis that one of the team at Colchester has just become a grandmother to a boy.
When deciding on a size it is a good idea to consider how fast you can knit as some pattern sizes can be at little as 3 months apart. I have chosen a Rico pattern to go with the baby Basics DK wool as a very good alternative to Sirdar. Rico patterns will show you a difficulty level to help you decide whether it is suitable for your skills.

Colours are always tricky to settle on if you do not know the sex of a child waiting to be born so most knitters use white, cream, yellow or green as neutral shades. Also it is worth noting that acrylic wools should be considered for the very young as wool fibres can affect their lungs.

Materials used

Just some of our beautiful shades
Rico Baby Classic DK wool: 2 balls petrol (shade 010),
 1 ball green (shade 028) & 1 ball pale blue (shade 023).
 1pr 3.25mm knitting needles
 1 pr 4mm knitting needles,
 wool needle (sewing) for making up
 and  scissors

Cast on. This Rico pattern suggests the thumb method of the cast on, which personally I find the easiest. A tip for this is to allow approximately 25cm (10”) for 15 stitches to be cast on and then add another 10cm (4”) to allow a tail. You need a little excess hanging after the cast on otherwise you may find the first stitch will not hold.

Cable patterns can be a lot simpler than you may be aware as you are still only using the 2 stitches in knitting (Knit or Purl). This pattern calls for a cable row once every 8 rows and it is using the knit stitch only.

When doing cable patterns I use a pad to write down how many rows to the pattern and then mark each row off once completed. This means when you knit the second side of the garment you already know how many rows it will finish on.

If you choose a pattern that requires multiple colours remember to twist the yarns at the back of the work every 4-5 stitches so that the garment is not pulled in making it too small once finished.

Work your way through each piece of the pattern (back, front and sleeves). Before you can knit the neck line you will need to join the right shoulder seam. I normal sew the garment up with the yarn I have used unless it is a very chunky yarn as you do not need to find a matching thread that way. I will often use the tail of the cast on and off as the start of the making up, so it provides a nice finish and less strands to weave into the garment afterwards.
If you have chosen a cardigan remember to purchase that extra button and sew it into the side seam (inside obviously) as not all buttons are always available.


If you would like to see more knitting blogs (or indeed on any particular area of interest within our trade) please drop a line via face book, twitter or our website www.fabric8online.co.uk
Alternatively drop into a branch.
Tina signing off until next time. 

Monday, 28 January 2013

Trouble Shooting Your Sewing Machine

We all have trouble with our sewing machines from time to time. Sometimes our seams are very weak, other times stitches are being skipped. Here are a few simple things to check before running to get your machine repaired.

Problem:
Fabric is not being fed through the machine.

Check to see if the "dogs" (the feeder grips) are engaged. Many times I've used my machine for free hand embroidery or sewing on a button and had to lower the dogs. I've then forgot to raise them and wondered why my machine wasn't feeding through fabric.

Problem:
Thread bunching under the fabric, weak seams or uneven seams.

When your computer is acting up your first instinct to turn it off and on again. Re threading is the equivalent for a sewing machine.

If re-threading doesn't help double check your tensions. I filmed a quick example of how incorrect tension can effect your sewing. This also means you can finally put a voice to the blog :)


Problem:
Skipped stitches, fabric  getting damaged, thread still snapping despite tensions checked.

When we start sewing the books always say "new job new sewing needle" and yet so many people never actually use a fresh needle. Needles work out at around 50p, a fraction of the cost of the fabric, thread, interfacing, buttons that we use on a sewing project. I've actually served someone in the shop who refused to sew denim because she would have to change her sewing needle, something she had not done since buying her machine 4 years ago!

  A blunt needle can cause skipped stitches and damage the fabric as you sew. An old needle can also bend slightly this can actually damage your machine! The picture shows the footplate of my sewing machine where a bent needle actually shipped away some of the footplate itself. This was left jagged and would snag fabric as it passed over. A little attention with a needle file helped solve this, but it taught me the lesson of the damage a bent needle can do.

It is also important to use the correct size needle and the correct type of needle for the task at hand. Your sewing machine manual will have a chart showing you which size and style the recommend for each fabric.

Keeping you machine in good running order is always advisable. You tend to be unable to oil modern machines (again, check your manual  but your machine will run better and for longer if you pop off the foot plate and clean the fluff out every few months.


Monday, 21 January 2013

Some handy hints for storing fabrics.

Like many shops we are holding a January sale. We've reduced all sorts of fabrics, from light weight silks to festive craft cotton. I particular I like a ruffly fabric that's now only £10.00 per metre.

 Many customers have been picking up fabrics for up and coming projects, we even have some Easter fabrics in the sale so they don't need to wait long before they can get sewing. However some people felt they couldn't take full advantage of the sale as they were concerned about storing fabrics until they were needed.


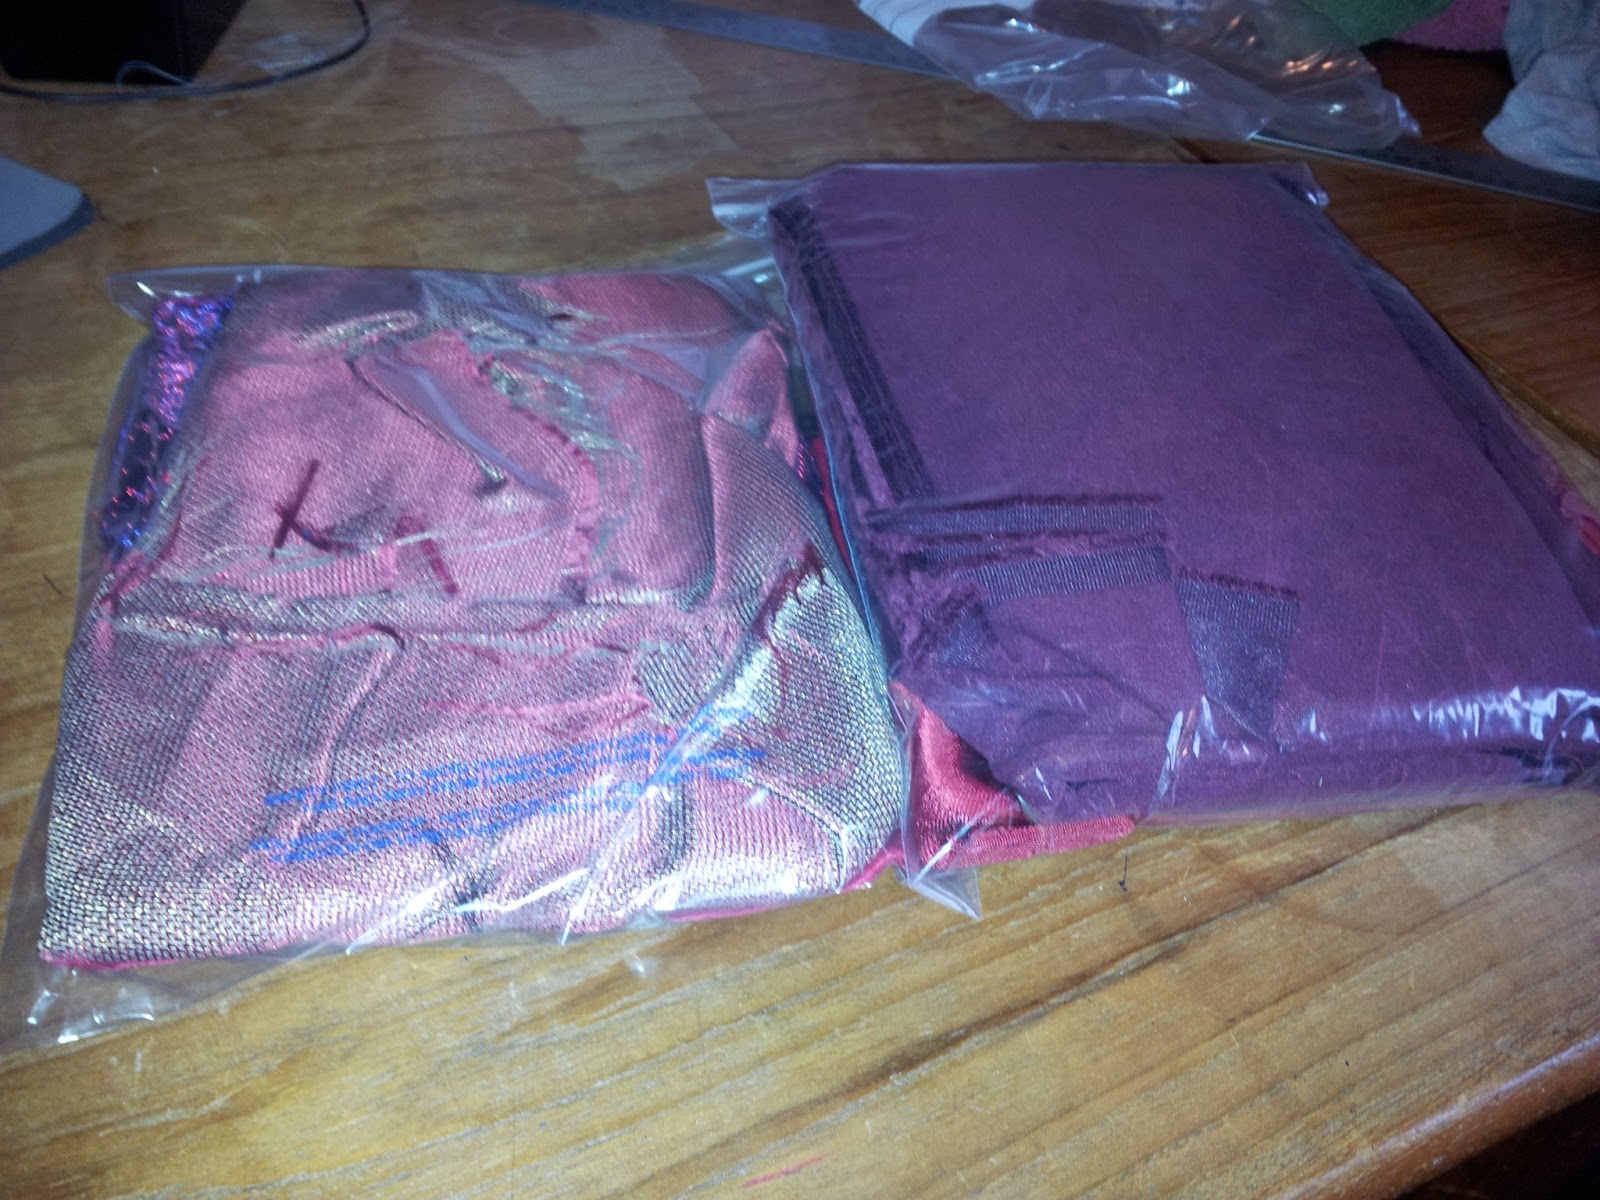
Hence this little post about how I personally store some of my fabrics. Here is a very heavy cotton which one day I may finally get around into turning into a waistcoat. (most fabric, if left near me  for long enough will turn into a waistcoat).  This is 112cm wide and there's about 3 metres in the photo.


By carefully folding the fabric I can fit it into a sturdy A4 ziplock bag. Gently squeezing all the air out before zipping the back shut helps reduce the amount of space the fabric takes up. In the bag it is protected from most pests that can try to get into the fabric as well as pet hair.  You can buy A4 ziplock bags from many stationary  shops, although I got mine on E-bay.
You can also group together smaller pieces of fabric, like this collection of remnants.

Here we have around seven metres or soof fabric in varies shapes and sizes. I group mine by colour or fabric type. I then write on the bag with a sharpie, listing the contents and if the fabric has a particular use, in my case this will be for "Belly Dance Costumes" or "Steam Punk creations".  This way if I need my fabrics for a project, but haven't decided which one to use I only have to rummage through one small bag instead of my entire fabric collection  The same is true for if I need a certain colour of fabric.

I then take these bags and file them away in a box. This box is designed for under bed storage. It costs less than the savings on one meter of some fabrics in the sale making it a fantastic investment. When ever I need to lay my hands on a fabric quickly I can just flick through the bags thus making no extra mess. Before I organised my fabrics like this I'd end up having to re-fold and re-stack all my fabrics to find the fabric I wanted.

Simple little steps like this can make a huge difference to the pleasure you get from sewing, as well as helping you spend your time more efficiently.

By the way, if you wish you could shop in our sale but live too far away from a Fabric8 shop then check out our clearance section on our  website at http://www.fabric8online.co.uk/

Monday, 14 January 2013

How to line your curtains

In our last blog we talked about the different types of curtain lining available, and the benefits each one has to  offer.
  In this blog I want to show you two simple methods to line your curtains. The first is VERY quick and does not involve sewing or unpicking seams in your existing  curtains. This method will provide thermal insulation, light proofing if a lightproof lining is used and help protect your curtains. As you do not have to alter your existing curtains this method is also useful if you are not confident enough  to take a seam unpicker to your drapes. It is however not suitable for adding body and depth to your curtains.

A few points for both methods. At no time do you need to unpick the hem at the bottom of a curtain. As a result you don't have to worry about blind hemming (the type of hem that is normally used in curtain making), you can just use a regular hem for the lining.

When we refer to the right side of the lining we mean the side you well see when you look at the back of your finished curtain.

Curtain sewing is actually pretty simple, BUT there is a LOT of fabric involved. Take your time and double check you are  not sewing the side of the curtain to the top of the lining (or the other way round). And yes, I've made that mistake a few times.

You will need;
Scissors
Pins
Sewing needles and thread
Curtain header tape
Tape measure
Curtain Lining 
Measure  your curtains, taking the width measurement from the bottom of your curtains (taking the width from the top can be difficult as your header tape has probably caused the fabric to become pleated or gathered).

The first method, leaving your curtains intact. 
For the width of lining required take the width measurement and remove 2 cm, then add a hemming allowance for either side. For the length take the length measurement and subtract the height of the hem of the curtains, then add an allowance for the hem you wish to use on the lining), Thus your lining will be slightly narrower and slightly shorter than your curtain.

 Hem the sides of your lining and the bottom of your lining.

If you are in a rush and your lining fabric is non fraying (like a lot of light proof fabrics) you can skip the hemming (and just cut the lining smaller) However hemming adds very little time indeed.


Along the top of the lining fold 1 cm of the fabric from the right side to the wrong side.

Pin the hemming tape just below the start of this fold and sew along the top edge.


Then sew along the bottom  of the hemming tape

Tie one end of the hemming taps cords together, then gently pull on the other and spread the gathers out until the width of your lining matches that of your curtain.


Using curtain hooks attach your lining to either the header tape of your curtain, or to the sliders attached to your curtain.


This method will help insulate your home or block out light, it's very quick and easy to do and a perfect way to protect your home from the cold and drafts in the winter months.


The Second Method

If  you want to use an interlining to give your curtains a more luxurious look, or if you want your lining to be more securely attached to your curtains then you will need to use the following method.

Unpick the side seams of your curtains and the curtain header tape. It's possible the header tape's cord has been cut short once the gathers have been pulled into the curtains so this will need replacing. There is no need to unpick the bottom hem!


The sides of the curtains wrap around to the wrong side by a few cementers. So measure the width of lining you need from this edge to the edge of the fabric on the other side and add your seam allowance  For the length of lining required measure from the top of the curtain to the start of the hem of the curtain, then add a hem allowance.

Hem the bottom of your lining.


Check the length of your lining by placing the bottom of your lining next to the top of the hell of the curtain. The top of the lining should now meet up with the top of the curtain.

Open up the side hems of the curtains. With right sides together sew the sides of the curtains and lining together.

Pull the curtain right side out. The curtain fabric should be wider than the lining,  so the back of the curtain looks much like it did before, with the curtain fabric wrapping around to the back as in the picture.


Fold over the top of the curtain and lining along the fold line originally in the curtain. Pin the new header tape just below the top of the fold. Sew along the top edge of the header tape and again along the lower end.


Tie one side of the header cords into a knot and then gently pull the cords on the other side to gather the now lined curtain to the desired width.
If you are using an interlining tack the lining to the interlining and use as if it's one piece of fabric.

This may seem long winded but once you get going you will develop a feel for this sort of work. Even if you just use the first method to quickly back your curtains you will feel the benefit of your labors straight away.

Sunday, 6 January 2013

Lining Curtains, A New Year's Project

I always return to my sewing room invigorated after the Christmas break. I always enjoy working on a project that will give me real long term benefits when the new year starts. So in a bid to cut down on my heating bills and to enhance my sewing room I've decided to line my curtains.
There are several very good reasons to line your curtains;

1) To make your curtains last longer. The reverse side of your curtains can spend a lot of time exposed to the sun. This can lead to the pattern on the curtains becoming faded, or the fabric weakening.

2) Protecting your home from drafts and lowering your heating bills. Whilst any barrier between your room and window is beneficial to your heating bills, a special thermal lining can dramatically cut down on drafts and help keep your room cosy and warm.

3) To add body to your curtains. Pleats and folds in the fabric of your curtains look more pronounced with the correct lining or inter lining. The result can be quite dramatic, making your curtains and indeed your room look far more luxurious.

4) Blocking out the light. Whether you need a room dark in the day time due to working shifts or watching television, or if you have a street light right outside your bedroom, the correct lining will help any curtain block out the light.

Here are some examples of the linings available with  their properties, to help you choice the right lining for your needs.

Basic curtain lining  comes in both ivory and white. This is the cheapest lining available and will help towards insulating your curtains and protect your curtain fabric.  However this lining will not add much body to your curtains.


Curtain interlining  adds depth and body to your curtains. It also adds much greater thermal insulation than regular lining. A soft fuzzy fabric, the interlining is sandwiched between your curtains and a lining fabric.


Blackout curtain lining is a synthetic fabric. it has a rubber or plastic feel to it and provide fantastic light proofing. It's also a very good thermal insulator  however does not provide the extra body that the interlining does.

Bonded interlining provides a simpler way to interline your curtains. The fuzzy warm interlining is bonded to a lining fabric all ready for you to sew onto your curtains in one easy step. This provides protection for your curtains as well as insulation and adding body and fullness.

Next week we will  show you several different ways to add lining to your existing curtains  to help keep you warm in the coming winter months.

Monday, 31 December 2012

The new year to come

For many the time just after Christmas is a time for relaxation. Not for us however, we have a sale on! Whilst the shop floor staff are being kept busy with the sale our management team are hard at work plotting the course for the coming year. These plans also include exciting new tutorials for the blog, everything from lining your own curtains to making your own baby clothes. But this blog isn't just about us. What do you want to see in the next year?

We wish you all a happy and contented new year, and look forward to sharing 2013 with you.

Monday, 17 December 2012

Our thoughts at the end of the year.

Of late these blogs have mainly been tutorials for sewing projects. However when they  began they also included views from and of the  textile world. This entry is our little wrap up of the year.

Gathered around a Christmas meal organized by our newly promoted manager,  we took stock of the last 12 months. We also spoke about how much we enjoy our work, and why we enjoy it. Good workmates obviously help, as does creative management. But there is also something inherently good about working in our field, mean people tend not to sew or knit. All of our customers are -by the very nature of requiring supplies form us- creative and imaginative. They all have a wonderful drive to create, to fashion something new into this world. This is why we changed the name of the shop 3 years ago. We used to be "The Remnant Shop" and under this name we carried similar  stock to what we have now, but we were well known for having a LOT of remnants. But we came to realize that what we stocked wasn't as important as what we enable people to do, and that is simply to create. Hence the new name Fabric8, we sell fabric to help you fabricate new things into our world.


  In the last 12 months our customers have been as creative as ever, and we've adapted to help them. We now stock much more knitting wool and knitting tools for instance. We've held sales and maintain a clearance section on our website to help people try out new ideas without so much financial risk. We now carry more woolen fabrics for the reenactors who visit  us.  For those who come to us to make smaller craft projects like fascinators and hats we have added more clips, feathers glues to our range.


We even stock daylight simulating work lights and magnifiers to make it easier to work where ever you wish.

  However this blog isn't just about our wonderful little shop, the shop each and every staff member is determined to make into the best fabric and haberdashery shop in the world. It is about you. This blog is read by people from all over the world, people who can't visit us in person. Some still visit our website, but you  don't need to order from us to use this blog. We're excited by the idea of people near and far becoming more creative and we see it as our mission to inspire and help them in every way. And so as Christmas comes near and the year draws to a close we ask this, how can we help? Feel free to ask for help with  your projects, if you're struggling others may be too. And please share the information in the blogs. And thank you for visiting us, whether it would be the website, the shops out there in the real world, our Twitter feed or our Facebook, we really do appreciate it.
Merry Christmas to you all, or winter festival of your choice, and a happy new year.