Last week's blog was "How to make a quilted panel" to be part of a steampunk fabric cushion. Top stitching this panel on to an existing pillow case could prove difficult. If I simply stitched directly onto the case it would be very easy to stitch through both layers of the pillow case. I also didn't have pillow case at hand which I thought would fit well with the room. With this in mind I thought I would make my own pillow case. This way I could top stitch the panel onto one side of the case before making the whole case up. Making a pillow case or cushion cover is pretty simple, the only tricky thing is the envelope opening at one end. This envelope style is useful as it doesn't require buttons, Velcro or zips which can be uncomfortable when you lay against them.
You will need:
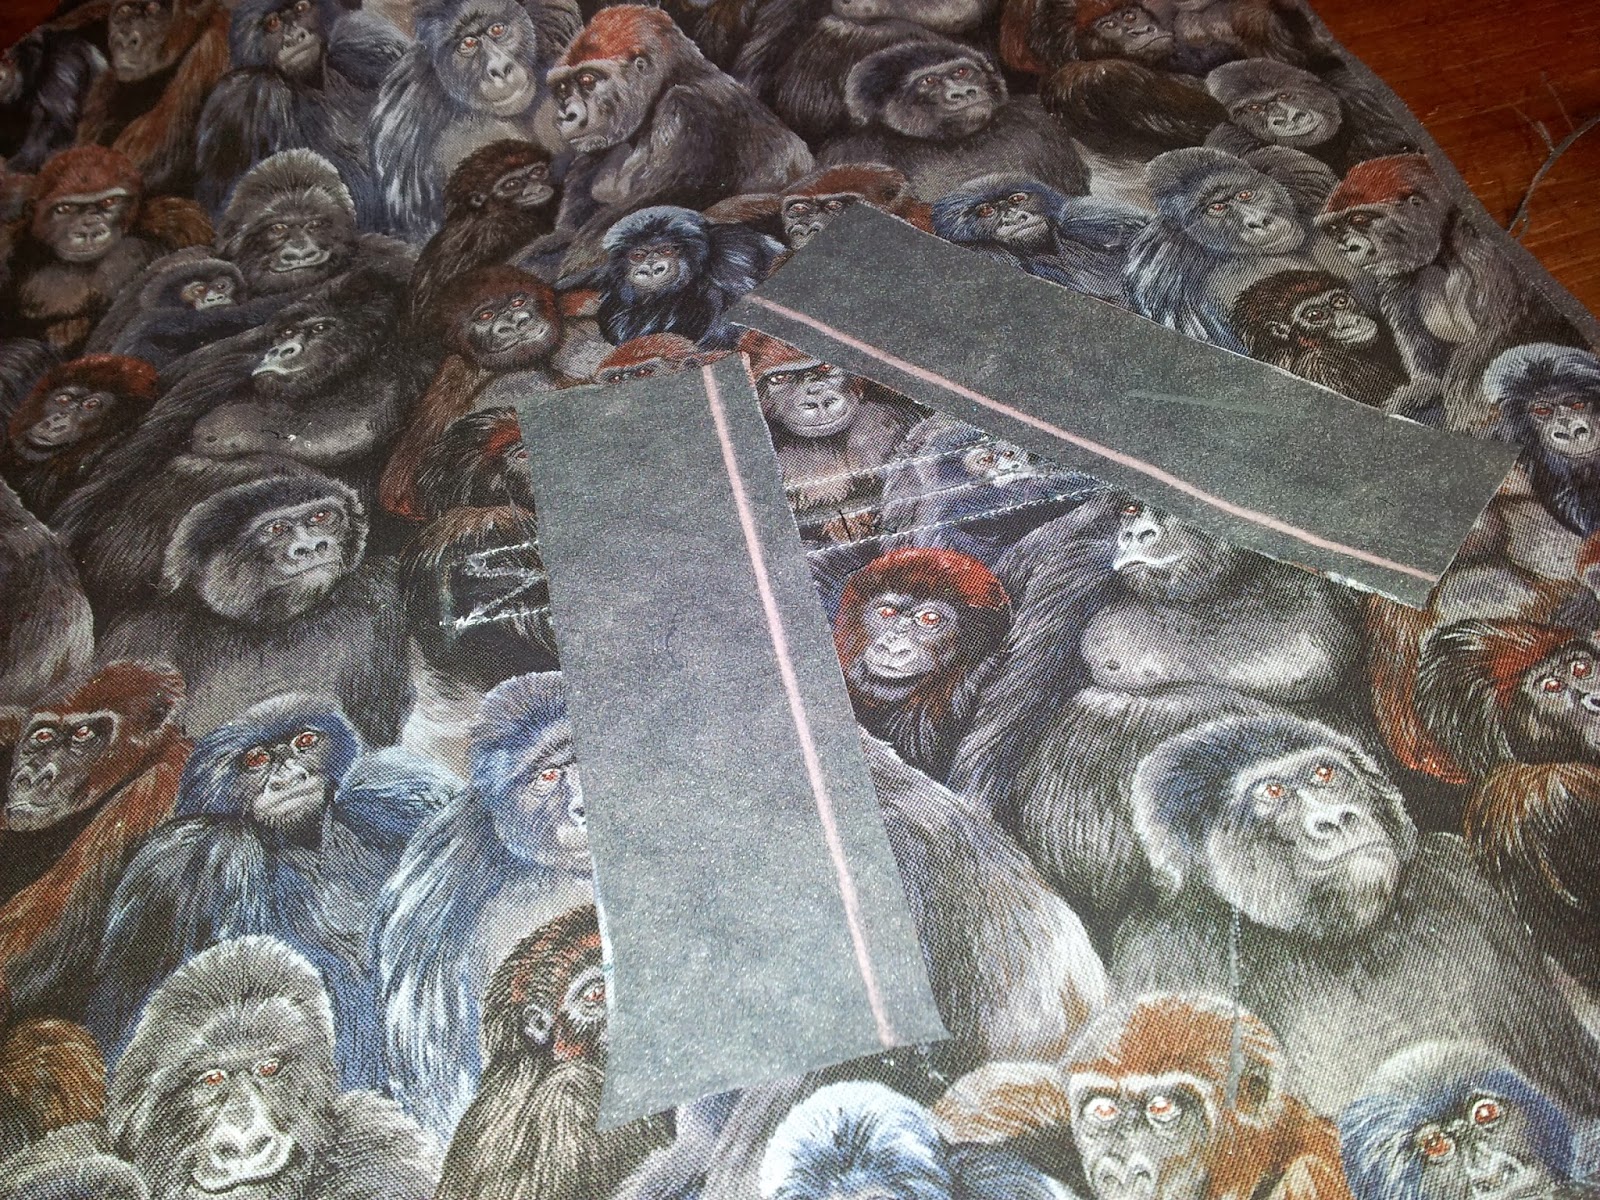
Two strips of fabric one 3cm longer than your pillow and 6 cm wider.The second piece has to be 15cm longer again. Pins Needle Chalk
Step one Cut out the two rectangles of fabric. About the width of your pillow with 6cm added to width of both rectangles and 3cm longer than your pillow on one piece and 15cm longer on the other (this extra length will form your envelope). Hem one of the short sides of each rectangle. A trained kitten to hold the fabric in place is useful here. An untrained kitten on the other hand makes things a lot harder. Check here to see how to hem .
Step two If you're adding a panel to your cushion or pillow case then now is the best time to top stitch it in place. Decide which side of the pillow or cushion case you want your panel to be on. If it's on the shorter piece then place the panel in the middle. If you want it on the longer side remember it does not go in the middle, but 15cm to the side of the middle to allow for the envelop opening of the pillow case.
At times it can be tempting to try and hurry through stages like this. However it is often quicker to take your time. In this case I positioned the panel in the middle of pillow case panel and pinned it in place before carefully top stitching the middle section to the pillow case. This secures the panel to allow you to then smooth out the fabric and pin and sew the outer edge of the panel to the pillow case panel.
Top stitch the out edge to the pillowcase.
Step three.
Place both panel pieces right sides together, lining up the NON-HEMMED short sides. One piece (in this case my red piece) will be longer than the other.
Fold the extra length of fabric over the shorter piece. Now pin and stitch the two sections together, leaving a 1cm seam. Sew lone edges together (at the ends you will be sewing through 3 layers of fabric). Sew the un-hemmed short edges together as well.
Pull the pillowcase right side out, and hey presto you have a pillow case. Once you have the hang of making pillow and cushion cases you will find you can run one up very quickly. These projects are perfect for using up any old odds and ends of fabric you may have at home. So get creative !
I have a chair I absolutely love. A leather captain;'s chair is a superb piece of Steampunk furniture. Whilst this creation of brass and oxblood leather may look superb it is not very well padded. I decided that instead of just buying a cushion I would make a padded, quilted panel to adorn a pillow case to use as a cushion.
I scavenged my pile of remnants for some suitable steampunk fabrics. Check out this blog on tips for how to store fabrics. A basic quilt can be made with small squares of fabric. I found a red fabric with a beautiful design about twice the size of my intended quilting squares. I decided this would become the central feature of my panel.
Each square of fabric would have a seam allowance of about 1cm. The central panel would have to be 1cm smaller on each side than TWO quilting squares to make allowances for the fact that it would not loose fabric to a seam allowance half way along it's length (as it was all in one piece)
The easiest way to sew lots of squares together is to sew them into strips and then to sew these strips together.
Right sides together pin and sew one square to another, and repeat to make a strip of three squares.
Repeat this until you have 4 stripes of fabric. Press the seams open.
Now line up one end of the strip to the central panel and right sides together sew along the length of the panel. This SHOULD leave one square not sewn to the central panel.
Now place the next strip along the other edge of the central panel, begin by sewing the end to the square of the first strip that is not sewn to the central panel. Now fold out and right sides together sew this strip to the edge of the panel.
Repeat for the remaining two strips. You should now have a square or diamond of patchwork. This by it'self can look very attractive, but I wanted to add an extra dimension. To give the panel a padded effect cat out two pieces of fabric the same size as your patchwork and some nice thick wadding. Sandwich the wadding
between the patchwork and one piece of the fabric WRONG SIDES together. Pin in place and starting from your central piece top stitch where one square of fabric meets another.
You should now have a beautiful padded panel. to finish the work place the second fabric piece over your quilted project RIGHT sides together and sew along the edges, leaving a gap to let you turn everything right sides out. Slip stitch this gap shut and you now have a stunning padded panel.
By itself this padded patchwork makes a nice decorative cushion, however the next blog will show you how to make a matching cushion cover opr pillow case to stitch it onto.
I love working in our fabric shop in Colchester in Essex. As I often say on these blogs one of the most rewarding aspects of the job is meeting interesting people and helping them out (mean and boring people don't sew or knit I've decided). Often I help people pick fabric or a pattern or advice them on what sewing needles to use. Sometimes I serve someone who wants to make something very simple but is afraid of not having a pattern as they are unsure about how to construct their project. With this in mind I thought I'd show some of the basic sewing techniques that are useful when making a simple project. I picked a simple tunic for a child (one of the most common projects for school plays). I folded a piece of fabric (right sides together) and sketched a simple neckline, shoulders and arm holes (just measure the child and add 5cm ease) the width of the fabric is half the chest plus 4cm seam allowances (2 on either side) and 5 cm ease.
Inside out, Right sides together.
If you read enough sewing patterns you'll see the words "with right sides together" so often you'll start mumbling them in your sleep. Traditionally when we sew we make up a garment inside out, this means when we turn the garment right side out the seam (or the narrow strip of fabric next to the where we've sewn) is on the inside.
How to get rid of "unfinished" edges.
An unfinished seam or edge of a garment is where the fabric is rough, and has just been cut. An exposed rough edge never looks nice and can fray very quickly ruining your work. There are a few classic ways of getting around this problem.
Line the Garment
Lining a garment involves making a second version of the garment (normally in a lighter weight fabric) and then sewing them together, right sides together (see there's that phrase again). This sounds like a lot of work but once you get the hang of it you'll see some advantages. Often for a simple outfit it's quicker to cut out to copies of your project and sew them together than to try fiddling with finishing off the edges. Also lined garments tend to last longer. When lining remember that you're going to have to turn the garment right side out so you need to leave a small gap to pull the fabric through. For an idea of what you need to think about when making a lined garment check out - how to make a waistcoat
Hem the edge
Hemming simply involves folding the edge of the fabric over by a small amount, pressing, and folding over again. Then stitch in place. Perfect for the hem of a dress, or trouser legs or a toga/tunic. However this can be tricky for a curved edge, such as a neckline, arm hole or circle skirt.
Bias Binding
At first glance bias binding looks just like ribbon.However on it's under side you'll see the fabric is folded at each side, meeting in the middle. Bias binding is made from a strip of fabric cut "on the bias" or at an angle. This means it can stretch and shrink on either side, letting you turn corners with it!
Wrap the raw edge in the bias and top stitch into place. This is a very quick and easy way to finish off neck and arm holes and can look great whether on club gear or school play costumes. I like to use a contrasting colour bias when I make petticoats.
Keep these simple points in mind and have a go at going freestyle on a simple project. you may surprise yourself!
Everyone in our Colchester and Felixstowe Fabric8 stores have been very busy these last few weeks. Christmas is always a very busy time for us, not just because of the festive rush but also because we start thinking of what we will stock in the year to come. In years gone by we would also be planing a new year sale. We haven't had one for a while and so we thought it was time to bring it back, with a twist.
In the past our sales were on a selection of fabrics, normally older stock. However these days stock doesn't tend to hang around for years on end. Thus we've decided ALL dressmaking fabric, quilting fabric and furnishing fabric are to be included in the sale. This includes some very new stock, such as this beautiful "Vintage Balloons fabric". Ideal for curtains this fabric was £25.95 a metre but is now only £18.17.
This Moto Rally fabric was £14.00 but is now only £9.80.
So if you have a furnishing project or dressmaking project you've been putting off now may be an ideal time to look at it again..
It's not just fancy and flashing fabrics in the sale. Basic stock items such as dress lining, poly cotton and plain cottons are also in the sale. Quite a few people have popped into the shop or placed web orders to stock up on the basic essentials that we all know we will need through the year.
Sometimes gift wrapping is there to disguise what a gift is, but other times you just want things to look pretty. We have shown you how to make a pouch before, and these are great for gifts such as dice or other knick-knacks and make great gifts by themselves. Organza gift bags are a fantastic way to add sparkle to a gift such as wine, or for placing lots of smaller gift wrapped presents in.
I chose organza as to me it's very ethereal and magical. However it's iridescence causes one problem, you can see the seam allowance. So for this gift bag we will use French seams which look much neater than a visible rough seam. Another advantage of organza is that it is very easy to store your left over bits for projects just like this. Check out our guide on how to organize your fabrics.
Step One Cut out a rectangle of organza. Make the rectangle about 50% larger than your gift.
With WRONG sides together pin the rectangle together along the long and one short edge. Normally we sew right sides together but with a French seam we start with wrong sides together. Sew with a 1cm seam allowance on the long and one short edge.
Step Two Press the seam allowance to one side.
Turn the bag inside out and again press the seams so they are neat and straight.
Step Three
Sew along the seam allowance. Now if we turn the bag right side out we can see the seams are now totally enclosed. This is not only more attractive than rough seams being visible, it also makes the bag much more durable.
Step Four
All that remains is making the casing for the ribbon. To begin with hem the top of the bag (folding the rough edge in on itself, pressing and folding again).
Now fold the top of the bag down so the bag is at the right height.
Now mark where you want the ribbon casing to be.
The unfold the top and place a small button whole on each side of the bag, where the seam casing will be.
Step Five
Fold the bag's top inwards so the bag is the desired hight again. Now just run two parallel lines on either side of the button hole stitch.
Attach a safety pin to the ribbon and use this to thread through one button hole right around the bag's casing and out through the same button hole. Repeat for the second button hole. Make sure to tie a knot in the ribbon once it's threaded to stop it being accidentally pulled out.
And behold you now have a stylish and possibly magical organza gift bag. A perfect way to add sparkle to any occasion. And a great use for left over fabrics.
From all at Fabric8, Merry Christmas, and a crafty new year to you all.
I've been teaching a friend to sew for a while now. Together we've made skirts and bodices and our current project is a waistcoat. Now I've been sewing for 10 years and have made well over 50 waistcoats, so I thought this would be simple. However in all my time sewing would you believe I have NEVER had to make a double welt pocket? I've made so many single welt pockets I feel confident enough to add them to patterns that are pocket free, and to turn mock vet pockets into real pockets. I followed the advice I normally give customers in the shop when facing something new. Have a large mug of tea on hand and take your time.
We struggled with the instructions that came with the patern for quite a while before making a big decision. Instructions are just ONE way to do things. I checked my books and looked on line and found MANY different ways of making a double welt pocket.
Then I found THIS video and decided it was the most simple way forward.
I thought people may find it useful to see how someone else interprets the instructions and so here is my attempt to follow the instructions.
This method of making the pockets starts with the welts being interfaced and unfolded. The method I originally tried involved started with he welts folded in half (wrong sides together) and a baste stitch along the long edge. I either had to unpick the baste seam or cut out fresh welts and interface them.
I had already slashed the pocket hole in the waistcoat open in the previous pocket making attempt. To keep the pocket area stable I pressed all the seams shut and interfaced the wrong side of the fabric over the slash. This should help keep everything stable whilst I sew.
When sewing in the middle of a garment you will not be able to see the seam guide marks on your sewing machine. Therefore it is a good idea to mark out the stitching line with chalk first.
Step Two. Sewing the welts onto the garment.
Pin the welts so their edge s meet together at the slashing point on the garment. Stitch along the chalk line not from end to end but from the circle mark on the pattern to circle mark on the pattern. If like me you are working without a pattern then sew from the point where the slashing end, about 1cm in from the welt.
Step 3. Slashing the Garment and Turning Through.
Fold back the welts so you can see the slashing line and carefully slash open the garment. Slash a straight line 1cm from the end of the cutting line on each side. Then cut two diagonal lines to 1mm from where the welt is sewn. repeat on the other side of the pocket.
Fold the welts to the inside of the garment.
Press the seam allowances of the went and garment open.
Step Three. Tagging the "Duck Tails".
If everything has gone correctly the right side of your garment should look like this. The hard work is really done (and it wasn't that hard was it?)
If you look on the right side of your garment the vent should now be taking shape. If you are following a pattern the welts should be folded so the meet in the middle of the pocket and their raw edges match up to the raw edge of the pocket slash. If not fold and press your welts into the correct position and trim them so they match the raw seam. On either side of the slash in the garment you should have two small triangles of fabric. These are the Duck Tails. Fold your garment over on it's side so the pocket welts and the duck tails lay flat on your machine and sew these duck tails down.
Step Four. Sewing the Welts on the Inside of the Garment.
Give everything a good press again. Now pin the lose edge of the welt to the seam allowance on the slashed part of your garment. Sew WITHIN the seam allowance of the slash seam. Repeat for the second welt. The welt is now secure, all that remains is sewing on the pocket bag.
Step Five. Sewing on the Pocket Bag.
One of the many difference between a single welt and double welt pocket is that of the pocket bag. Single welt pockets have a one piece pocket bag, double welt pockets have a two part pocket bag, nodally one piece made of lining and the other of the outer garment fabric. I began with the lining pocket piece which is attached to the lower welt.
Place the pocket piece on the lower welt on the reverse side of the garment. "Right sides together" the pocket piece should appear "upside down" so it's point towards the top of the garment. Stitch the pocket bag in place within the seam allowance of the welt.
Repeat with the second pattern piece which is places rights sides together against the top welt (so the pocket piece is pointing towards the bottom of the garment. Again stitch to the seam allowance of the welt.
Step Six. Stitch the Pocket Bag Together.
Rest the top pocket bag on top of the lining pocket bag, pin together and sew in place.
And behold you have a fantastic double welt pocket! When you open the pocket you will see the same fabric as the garment is made of.
I have to admit I really enjoyed learning a new technique for sewing. I'm also amazed at how neat and professional the finish on this pocket is. I will definitely be using this method again.
We have been making these blogs for a few years now, and one thing I'm always surprised at is the timing. This will be the fourth time someone has asked me how to make something in our shop just as I'm about to pop a tutorial on the subject on-line.
This sewing project was born through necessity. I lost my favourite velvet scarf and had no intention of paying £25 for a replacement. I took a good look at a scarf in a shop and decided I could make it for around £5.
I decided my new scarf would be velvet to replace the one I lost. I was never a fan of the long tassels at each end of the scarf but found scarves without a decorative edge seemed a little unfinished. One perk of sewing your own clothes is that you don't have to make compromises. I decided to use a short fringe so that the scarf will still look sophisticated., but not get tangled up.
Step one. Marking out.
Take your half metre of velvet and fold it in half, so you have a rectangle 150cm by 25 cm.
Mark where the fold of the fabric is, and then unfold it, so you have a mark half way on the short side of the fabric.
Step two. Adding the fringing. The fringing is held on a strip of braid. We will want the fringing visible but not this braid.
Pin the fringing along the short edge, going from the edge of the fabric to the middle point we just marked.,
The braid of the fringe should be along the edge of the fabric and the fringing pointing down the fabric.
Stitch the fringing to the velvet along the braided edge. Repeat on the other short edge.
Step Three. Sewing up. Fold the fabric in half along the long edge, right sides together. Pin and sew with a seam allowance just wider than the width of the braid that holds the fringe. Make sure to leave a small gap on the long edge around 10cm long.
Pop your hand through the gap and pull the scarf right side out. Press with an iron and slip stitch the gap shut. (Or just use wunder web).
And Hey Presto you have a fabulous scarf to cut a dash in (or to give as a gift) for around five pounds.
Version 2
The above scarf has three sides sewn. It is just as easy to make a scarf out of two narrow strips of fabric of around 150cm by 28cm. Whilst this means you have an extra seam to sew you have the opportunity to use two different colours of velvet, or to add ribbon to one side of the scarf.
The only difference to the above method is you don't have to find the half way mark on the short end. Simple pin the fringe across all of the short end, you can also top stitch ribbon along the width as well.
Then just sew the two strips of velvet together, right sides together again leaving a gap for turning through.
There you have it, two ways of making a simple but sophisticated scarf. These scarves were an experiment in that I used a velour with a stretch. I was concerned that this would make the scarf shapeless, but I've found it works fine.

 Cut out the two rectangles of fabric. About the width of your pillow with 6cm added to width of both rectangles and 3cm longer than your pillow on one piece and 15cm longer on the other (this extra length will form your envelope). Hem one of the short sides of each rectangle. A trained kitten to hold the fabric in place is useful here. An untrained kitten on the other hand makes things a lot harder. Check here to see how to hem .
 If you're adding a panel to your cushion or pillow case then now is the best time to top stitch it in place. Decide which side of the pillow or cushion case you want your panel to be on. If it's on the shorter piece then place the panel in the middle. If you want it on the longer side remember it does not go in the middle, but 15cm to the side of the middle to allow for the envelop opening of the pillow case.