Wednesday, 12 June 2013

Fairy Tu-Tu or Petticoat.

A local group have decided to organize a grand Gathering of Fairies on Sunday the 23rd of June at Ipswich  in an attempt to break a work record for the number of fairies in one spot, as well as to raise money for Woolverstone Wish. The definition of a fairy is someone with a tu-tu or petticoat, wings and a wand. I've already been asked to make a petticoat or three, and so I decided to show how I make my petticoats. There ore other, quicker ways which I'll cover next week, but this is my favorite way to make a petticoat.

My petticoats involve pleating a wide strip of dress net onto a very short satin circle skirt.  I think you get a lot of flounce out of just over a meter of dress net.

Step one. Making the Circle Skirt.

Do you remember learning all about Pi in maths in school, and wondering when you'd EVER need it. Well that moment is now.

Two make a circle skirt you need to make 2 circles (or in this case quarter circles), one for the waist and one for the hem. Start by taking about 1.5 metres of fabric (I used a cheap lining satin) and folding it at 50 cm (so your selvages are resting on top of each other).
Now a little about circles. The distance from the middle to the edge of a circle is called the radius. The outline of a circle is called the circumference.  The first circle that we make is the waist line. So we know the circumference of the first circle (your waist) so the radius as this circle will tell us how far  from the corner of the fold in the fabric we have to draw.

The radius is equal to the circumference (waist size) divided by  6.28 (or Pi multiplied  by 2)
I find it's better to add a good few centimeters onto the waist measurements, ideally it should fit over your hips with ease.

I wanted to make a petticoat with a waist of 125 cm (large but it will be elasticated). So the radius of the first circle is;
125 divided by 6.28= around 20 cm

Craw in a quarter circle on the corner of the folded fabric with this radius.
The next radius is easy, it's the amount of the first radius plus the length of the skirt (in this case it's a 15 cm  skirt) So the second radius is 35 cm.
If you haven't got a compass that is 35 cm wide (and not many people have) just use some non stretchy string measured out to the length you need and wrap it around the pen. Then hold the other  end of the string into the corner and draw in the quarter circle.


Cut out this quarter circle. As it was on the fold it should turn into a semi circle when you open it out. Keep it folded and use this as a template to cut out another semi circle on the other side of the fabric. With right sides together sew the semi circles together to form a circle.

Step Two. Making the waistband.
The waistband needs to be as long as the final  waist measurement you used for the circle skirt, in my case 125 cm long. Cut out a strip of fabric to this length and make it four times the width you'f like the waistband to end up (I use my metal ruler as a guide).


Now fold in half along the length , wrong sides together and press with an iron.
Open the fold and use the crease as a guide to fold the outer edges of the strip into the middle.

Fold it back in half again and press, this gives you what looks like large bias ribbon (but it is not on the bias).


Pin the waistband onto the circle skirt, sandwiching the circle skirt in between the fold of the fabric.

When the two ends meet stitch the strip of fabric together and THEN fold them over the circle skirt. Then stitch the waistband to the circle skirt, leaving a small gap to thread the elastic through.


Step Three. Pleating in the dress net

Believe it or not that's the fiddly annoying steps done. Now you just need to work out how much dress net you need and to pleat it into the circle skirt.

 You have the final radius of your big circle already, it's the first radius (in this case 20cm) and the length) in this case 15 cm, making  35 cm in total.

The circumference is the radius multiplied by 6.28 (which we all now know is Pi multiplied by 2)
In this case that's makes  219 cm.
You can please up to three times the final hem circumference into the skirt, making 660 cm.
You don't have to though. I decided to pleat in 6 meters (600cm) as this is four times the width of the dress net. You can make the netting as long as you wanted, I opted for 40 cm. So I cut out 4 sections of 150cm wide dress net that were 40 cm long. Sew these together into a circle right side together. I also decided to sew the seam allowance flat onto the dress net.

Put a pin half way around your circle skirt, and another  half way around the netting. These will act as a guide (you want them to meet up in the middle). Now with right sides together pin the netting to the satin circle, right sides together. In my case the pleats were almost but not quite touching each other. Make sure the half way pins in the circle skirt and netting meet up (for greater accuracy you can pop a pin a quarter of the way around the circle skirt and a quarter of the way around the netting  and  use them as a guide (these too must meet up). Stitch in place. Once you get a feel for making these things you can pleat as you sew, but to begin with it may be worth pinning the pleats in first.


You now have a petticoat or tutu. I like this method as it gives you  the opportunity to add more layers over time (just pleat more netting into the circle skirt).


However I like to add a bias trim to my petticoats.
This takes less time than you may think and it adds a lot to the finished garment. Simply take your bias ribbon and wrap it around the hem of your petticoat. Then carefully top-stitch the bias in place.

I think the finished petticoat looks much nicer with he trim (I particularly  like how the trim looks like it's just floating in air).  I intend to add another layer or two over the weekend, so check back to see how it grows.

I wonder if this Tu-Tu is suitable for a 20 stone Welshman?
Hopefully this blog will inspire you to have a go at making your own Tu-Tu's, and hopefully we will see you at the World Record  Breaking attempt in Ipswich 23rd of June

Monday, 3 June 2013

How do you get a design onto your t-shirt or other fabric?

Have you ever suddenly realised you had mixed up your party invites and you had a costume party to go to in one hour? This happened to me and my girlfriend a few weeks ago. We ran into my sewing room all set to fulfil the brief of the party, we had to bring out our inner geek. I took the quick and simple option and just put on one of my many Star Wars T-shirts. My girlfriend wanted to put a design onto an old t-shirt, in less than an hour! We didn't have time for Dylon Image Maker, we only had time for pens, and weirdly enough, Wundaweb.
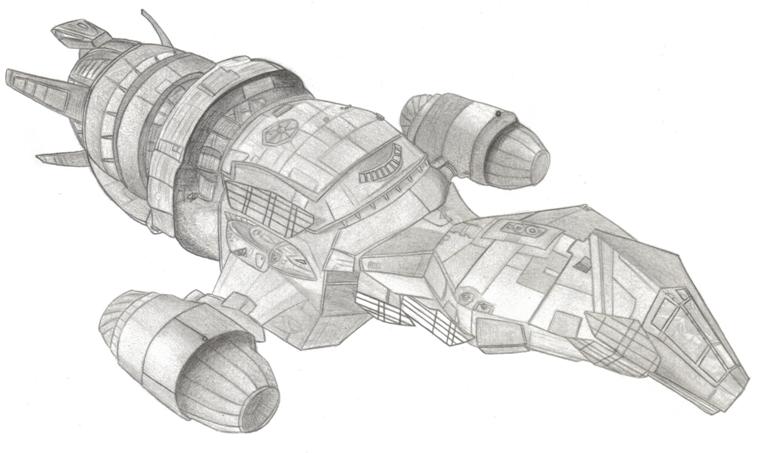
We had some fabric pens and permanent markers, however we only had one shot to make this work. The initial design was a little complex with plenty of chances to make mistakes. If you're wondering it was an image of "Serenity" from Firefly. If we could trace the design onto the fabric first it would certainly reduce the chances of messing things up. We had to think outside the box and use some of our dressmaking kit in new and interesting ways. 

 Option 1

Drawing out a design in free hand first with Taylors Chalk before filling it in with Fabric Paint or Fabric Pen.
If you find the triangular dressmaking chalk tricky to use then  there are Dressmaking Chalk Pencils out there as well as a special Vanishing Fabric Marker.

Handy if the design is relatively simple, but what if you have a more complicated design?

Option 2

Trace the design onto the fabric using Dressmakers Carbon Paper. This handy bit of dressmaking kit is normally used to transfer markings such as dart lines onto your fabric.  Dressmakers Carbon Paper actually comes in a lot of colours, and not in 'carbon'. Most packs have blue, red and yellow as well as white so finding a sheet to show up on your fabric should be easy. Place the 'carbon' paper onto the fabric (coloured side down) and then pop your design over the paper. Use a tracing wheel to transfer the design onto your fabric, and then use paint and pens to  fill it in.

Time was  running short  and whilst option 2 would work very well we couldn't get a print out of the design the right size. So a change of plan was in order. Pac-Man! Well more accurately one of the ghosts (who by the way are called "Blinky" "Pinky" "Inky" and "Clyde").  A "Blinky" was drawn out on graph paper to ensure it was nice and 'blocky'. The graph paper pattern was then used to cut the ghost out in some non fray velour. Eyes and pupils were cut out of felt. The pupils where added to the eyes with Wundaweb instant hemming tape, then the eyes were stuck to the body with wundaweb and then the whole ghost to the t-shirt with Wundaweb. Wundaweb Instant  Hemming tape is easy to use. You just place it between the two layers of fabric and then iron your garment. A pressing cloth isn't essential but gives a much better finish. One unique geeky t-shirt made in under 15 minutes. Instant hemming tape is normally good for 15 washes so it should last a while.

So next time you have to make something special in a flash DON'T PANIC! Just look around your sewing box and think how you can use things a little differently. 

Friday, 24 May 2013

Thoughts on making toys

We have often given you tutorials on how to make things that are suitable gifts, such as the carrier bag holder or kindle cover. We have also uploaded tutorials for projects that kids can make their selves, like our non-sewing cushion cover. However there is not much information out there for making toys FOR children. It can be a thorny issue as everyone is concerned about child safety.  So we've put our heads together and come up with a few things to think about when making a toy.

What are "Child Proof Eyes"?

Non-Child safe nose with washer
Child proof nose with hole
Most teddies and dolls have plastic of glass eyes and noses. These rounded eyes have a stem on the back which pokes through the fabric. They are then held in place with a washer which grips the stem. It doesn't take too much effort to pull the eyes (or noses) out. This represents a very real choking hazard. To help prevent this child proof eyes have a small hole drilled through the stem. Once the eyes are in place and the washer griping the stem tightly you can sew through this hole, stitching the eye to the fabric. Thus if the washer is worked lose the eye will not come out.  However in toys for younger children you can be even safer by replacing plastic eyes with fabric eyes that you appliqué on. Ensure the fabric doesn't fray first (give it a lot of tugs along the edge) or hem the eyes (a roll hemming foot is fantastic for this). Then stitch the eyes in place. Don't rely JUST on glue, although gluing the eyes in place first makes the sewing a lot easier.

What fabrics are suitable for a soft toy?
When people think of soft toys their first thought tends to be fuzzy teddy bears. There is a wide selection of teddy bear fur available and most of it is suitable for soft toys. However there a few things to think about.

Make sure the fur does not pull away from the backing fabric easily.

For toys for younger kids it's best to avoid very long pile fur as this can become a chocking hazard.

Avoid fabrics that are overly flammable (if in doubt to a quick burn test on a small sample).

Of course you don't HAVE to use fun fur. Soft natural velvet makes  a very soft and cuddly teddy. I have also seen some very cute toys in cotton.

How  do I pick a design?
 If you decide to use a commercial pattern for your toy then the pattern will give you recommended age ranges. Again there are a few simple things to think about.

Chocking hazards. When children put things in their mouths they may not just be tasting them. It's how babies and young children feel different shapes and textures. So avoid making toys with long limbs as these will end up in the little ones mouths and present a choking hazard.

You don't have to make a teddy at all. One of our customers made her child a cuddly book! Each page was a different colour with an animal appliquéd on top it. The cover was padded and very cuddly.

As well as sewing patterns we do sell some sewing kits and crocheting kits for stuffed toys.


What can I stuff the toys with?
We recommend Hollow Fill stuffing. It conforms with safety regulations as well as being much easier to use than any alternative. Avoid using scraps  of fabric. If a seam bursts then the strips of fabric you use to stuff the toy become chocking hazards. Using scraps also gives  the toy a lump feel and makes it harder to wash and dry.

We hope this blog helps you with what has to be one of the most rewarding projects you can undertake. I know a few of the teddies I've made have been well loved and have been handed down through families which always give me a warm sense of satisfaction.

Friday, 10 May 2013

Net Curtains and sewing projects around the home.

Many of us get a sewing machine and start thinking of sewing clothes.  However there are so many opportunities to use your sewing around the home. Here are  two quick and easy ways to put your sewing machine and skills to good use.

Net Curtains
 Net curtains help provide you with privacy without obscuring your view from your windows. They are also useful for diffuse harsh light, brightening up a room and tying together elements like furnishings, carpets and wall coverings.

To make net curtains you will need
Fabric - Voile, Muslin, Curtain Net or Organza.
Scissors
Pins
Sewing Needle
Thread
Net Curtain wire and hooks and eyes.

Step One
Measure and press your fabric. Your curtain needs to be at least as wide as your window, many people like to have the net curtain a little wider to allow for gathering.  Add 4 cm to the width for the hem and about 5 cm to the length for the hem and casing.


 Step Two
Hem the bottom of your curtain. Here a chequered pattern on your ironing board is hand. Fold the fabric from the right side to the desired width of your hem (about 2 cm in this case. a  check pattern on your ironing board helps.  Press the fabric to create a sharp fold.


  Then fold the fabric over again, so the raw edge of the curtain is now totally enclosed.. Press again , pin and sew the hem in place.

Handy Hint
If the fabric won't stay in place when ironed try a small bit of spray starch.

If your machine came with a rolled hemming foot and your fabric is thin enough, you may want to use a rolled hem in your curtains, such as this one.
Being able to make a rolled hem is a handy skill, and net curtains are a good way to experiment with them.


Step Three
 Hem the sides of your curtain as above. You may want to try to make these hems a little smaller.

At the bottom corner fold the side hem into itself at a 45 degree angle, pin the hem in place and sew in place.

Step Four
Make a casing  for the curtain wire. To do this just hem the top of the curtain in the same way you hemmed the bottom.


Now you just need to thread your curtain wire through the casing and screw the hooks and eyes into the wire (the curtain wire is threaded to make this easier). Place a hook into one side of your curtain wire and an eye into the other. Then screw the corresponding hook and eye into the window frame (or into the wall using the correct wall  plugs). We use a hook in one end and an eye into the other to make it  easier to know which side is the right side and which side is the wrong side should you have to take your curtains up and down.


Another simple project is to simply sew loops made from  ribbon onto your tea towels and wash cloths. This makes them stay on hooks much more securely.

So there we have two new simple ways to use your sewing around the home. Please check out our other handy blog entires for home projects such as...

Making a Kindle Cover


Making a Plastic Bag Holder


The Non Sewing Cushion Cover 

Home made reusable cable ties


How to Line your Curtians

Remember to enjoy your sewing, and to never be afraid to try out new exciting things.

Monday, 29 April 2013

Why do we love Rico Wool so much?

  Sewing and knitting are back in fashion (to my mind they were never out of fashion). People are starting to realise that creating your own clothes and accessories is without doubt the finniest way to express themselves. If you are tempted to take up kitting and crochet there are many knitting books and crochet books out there to guide you.

What many people  new to knitting and sewing may not realise is that you can create truly dazzling and unique things with only basic techniques. My waistcoats often receive compliments  but the pattern is basic, it's the choice of fabrics that sets them apart. And so it is with knitting. Rico do a huge range of yarns than enable to create breath taking tops, bags scarves, hats and so much more using pretty basic techniques. The secret is in the yarn!

Rico Creative Cotton
The crochet and craft yearn. Rico Creative Cotton is the yarn of choice for making household items as well as the popular Patchwork Family Crochet animals. knitting  as well as crochet. It forms a firm fabric with an even tension and is very comfortable to wear.

£1.99 for 50g


Rico Essentials Cotton Lurex
A fine cotton yarn, however this also has metallic lurex thread giving your project a glittering effect.

£3.69 for 50g

Rico Essentials Merino
An ultra fine DK (double Knit). Easy to knit with this yarn is renowned for giving very even knitting.

£3.99  for 50g

Rico Creative Pompom Print 
One of the more unusual yarns out there.  Useful for knitting truly unusual scarves or very cute tops and blankets.


Rico Creative Big Moment
Just one of these giant 200g balls will give you a beautiful scarf. The soft thick yarn subtly changes colour along it's length giving your work a soft cuddly and dreamy feel to it.

£14.99 for 200g


Rico Creative Micro Print
Another colour changing yarn. This acrylic yarn makes light and comfortable clothes  that are also easy to care for.

£4.99 for 100g


Rico Creative Reflection 
A light weight shimmering thread, available in regular or colour changing.
Clothes knitted from this thread take on a  beautiful  ethereal quality as the glimmer and shimmer in the light.

£3.49 for 50g

Rico Creative Filz Print
A strange little yarn. it has a very lose twist to it. Designed to be knitted up and the washed to turn it into felt.

£2.99 for 50g

Rico Creative Loopy-Pompom
Combining loopy yarn with pompom yarn.
Perfect for lightweight scarves for the spring and summer. In the brighter colours this also makes fantastic clubwear!

£6.99 for 100g


As you can see there are many types of yarn out there, each with their  own unique uses giving very different results. If you are new to knitting and crochet, or if you want to expand your horizons in the realm of crafting , we recommend just getting a few balls of yarn and playing. Playing around with fabrics and yarns is not only fun, it's the best way to learn and discover new techniques.

Monday, 22 April 2013

Knitting, Circler Needle or Double Point Needles?

I've been sewing for over a decade now and have lost count of the number of wedding dresses and waistcoats I've brought into the world. However I do occasionally have a go at knitting. Although as a bit of a nerd I tend to make Tom Baker era Doctor Who scarf when ever I can.


 Knitting did not always come naturally to me though. Before I only ever used wool on my loom,  for making medieval belts and cords.

After looking into knitting more I found out many of my friends are accomplished knitters (including many guys. Boys love gadgets and knitting is full of them).

One subject that has come up in knitting conversations regards two different techniques for tubular knitting. Some friends like to use a circular  knitting needles  others like to use a selection of double pointed needles. 

The Case for Double Point Needles.
When you first see double point needles you may be forgiven for wondering how on Earth you can use these to knit a tube. When  I first saw them I thought they were  beefed up toothpicks.

Double point needles are the traditional way of sewing a tube, such as  a sock. As many of my friends are historical re-enactors  they have chosen this method to knit socks and snoods. The needles are used to hold stitches in place whilst another needle is added for knitting more stitches.

Aside from just looking impressive there are some advantages over this older (and some may say trickier) method. 

Double Point Needles are easier to store

Double Point Needles offer you more control. Circular needles can normally only be used for one size of tube with a circumference  slightly larger than the needles you use. (there are ways around this, but they tend to negate the extra ease of using circular needles)

Circular needles don't tend to come small enough for socks.

Hints
If you are worried about the wool slipping off the needles then you can use commercially available stoppers (or make some out of corks). Whilst popping these on and off your needles can slow down knitting they can help someone new to DPN's to keep control of their wool. 

Learning DPN knitting and turning a heel at the same time may be daunting, so start making a simple tube scarf before going on to socks.


The Case for Circular Knitting Needles.

I have blogged about circler knitting needles before. (click here). A circular needle is in fact two needles joined together by a length of nylon or other smooth cord.

You can use these needles for more than knitting tubes. You can use the length of cord to help manage a larger flat panel as well as for knitting tubes.

Many people find knitting tubes with circler needles less complicated than with double points. The wool is certainly easier to control!

However as I  said before, smaller tubes such as socks need smaller needles and these may be very hard to find. 

In my opinion if you are making a sweater or other large project then the circular needles will give you constant and speedy results. However it is worth learning double point needle knitting for smaller tubes.
What do you think?